How to check if Windows 10 PC supports Mircast
Miracast is a wireless technology your PC, laptop, or tablet can use to project your screen to wireless TVs, projectors, and streaming media players that also support Miracast. You can use this to share what you’re doing on your PC, present a slide show, or even play your favorite game on a larger screen.(how to use miracast on windows 10)
Both your Windows 10 computer (PC, laptop, or tablet) and device (TV, projector, or streaming media player) must support Miracast to be able to project your computer’s screen to the device.
The device (TV, projector, or streaming media player) must support Miracast, and have Miracast turned on. To see if your device supports Miracast, you will need to check its manual to see if it’s a supported feature.
Miracast requirements:
- Graphics driver must support Windows Display Driver Model WDDM 1.3 with Miracast support
- Wi-Fi driver must support Network Driver Interface Specification (NDIS) 6.30 and Wi-Fi Direct
- Windows 8.1 or Windows 10
This tutorial will show you how to check if your Windows 10 PC supports Miracast wireless streaming and screen projection.
Here’s How:
1 Press the Win+R keys to open the Run dialog, type dxdiag, and click/tap on OK to open the DirectX Diagnostic Tool.
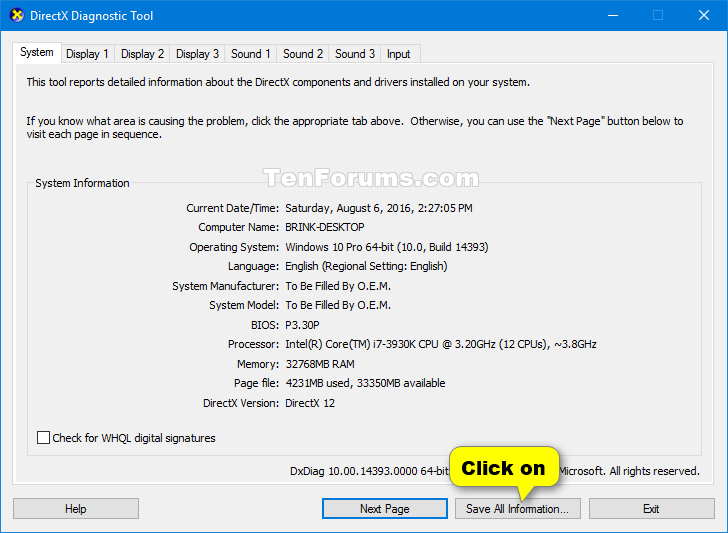
2 Click/tap on the Save All Information button in the System tab after the DirectX Diagnostic Tool finishes collection information. (see screenshot below)

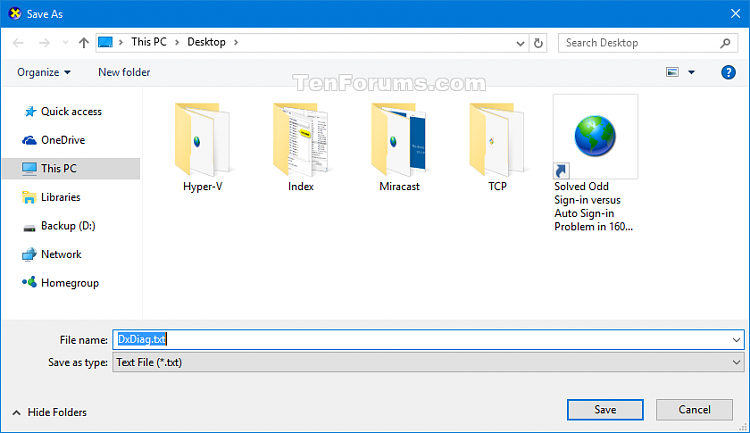
3 Browse to and select where (ex: Desktop) you want to save the DxDiag.txt file to, and click/tap on Save. (see screenshot below)
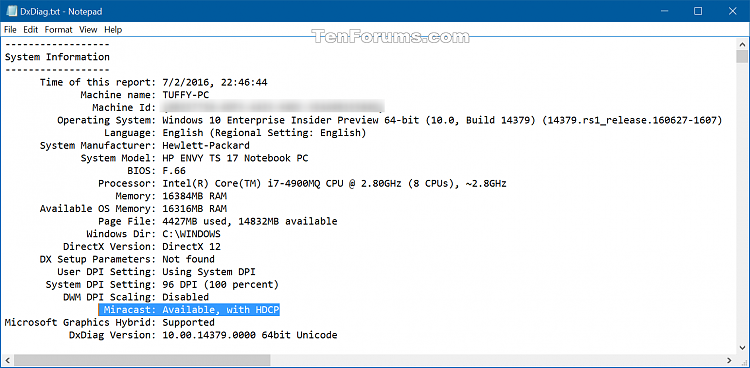
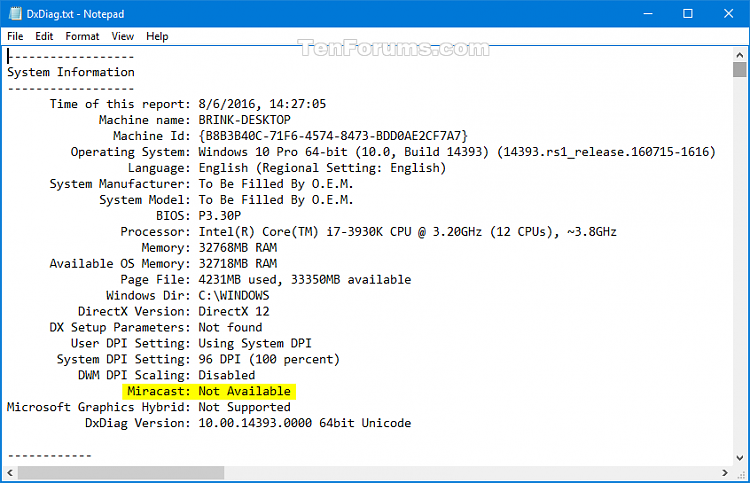
4 Open the DxDiag.txt file, and scroll down towards the bottom of the System Information section at the top to see what it reports for Miracast to see if it’s supported or not. (see screenshots below)


