How to project iPhone screen content onto MacBook?|BJCast
Method 1: Use AirPlay function
- Ensure that both your iPhone and Mac are connected to the same WiFi network.
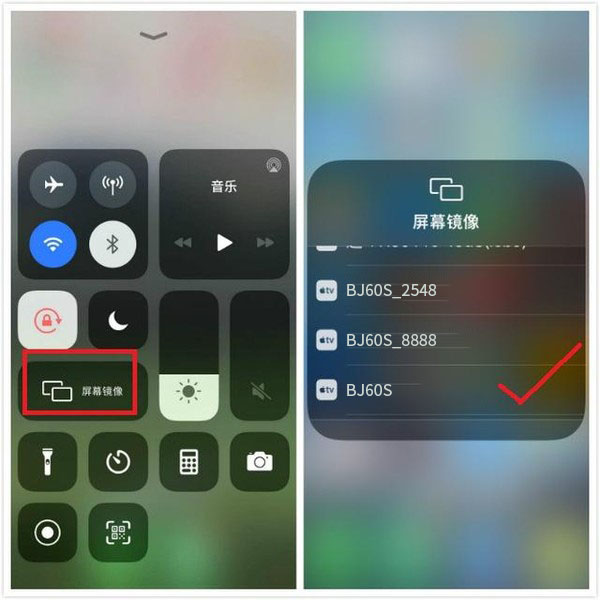
- On the iPhone, open the “Settings” app, select “General”, and then find the “AirPlay” or “Screen Mirroring” options.
- On Mac, open software that supports AirPlay, such as Keynote, PowerPoint, QuickTime Player, etc.
- Find and click on the “AirPlay” or “Screen Mirroring” button above the windows of these software.
- In the pop-up device list, select your iPhone device.
- Wait a few seconds, and your iPhone screen will be projected onto your Mac.

Method 2: Use third-party applications
- Download and install a third-party application that supports screen mirroring on both
- iPhone and Mac, such as the Bijie screen mirroring app.
- Log in to the same account on two devices and follow the prompts in the application.
- Select the content that needs to be projected on the iPhone, and then choose Mac as the projection target in the application.
- Wait a few seconds, and your iPhone screen will be projected onto your Mac.

Method 3: Use the “Space Play” function
- On iPhone and Mac, make sure that the “play in between” feature is turned on. On Mac, it can be set through the “Display” option in “System Preferences”.
- Connect iPhone and Mac to the same wireless LAN.
- On the iPhone, find the content you want to screen (such as photos, videos, etc.), and then click the “Play in Space” button.
- In the pop-up device list, select Mac as the playback target.
- Wait for a few seconds, and the content of your iPhone screen will be projected onto your Mac through the “play from afar” feature.
The above three methods can all achieve iPhone screen mirroring to Mac, and you can choose the appropriate method according to your device and needs.