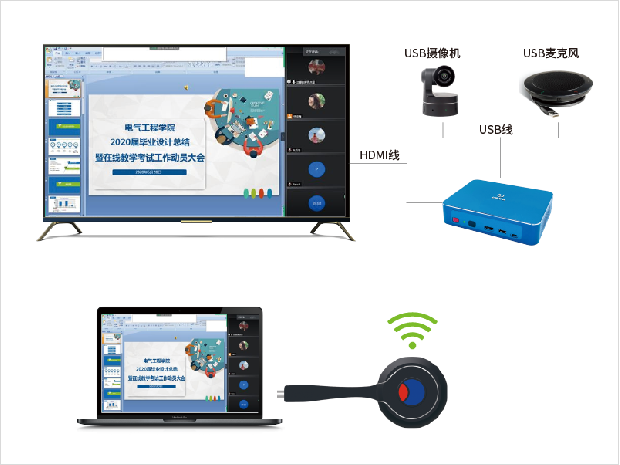
Computer screen projection television is a technology that transfers the content of a computer screen to a television, allowing us to watch videos, pictures, or perform games on a large screen. The following will introduce the principle, method, and precautions of computer screen projection television, to help everyone better achieve the connection and screen projection between computer and television.

Computer screen projection television mainly relies on Wi Fi wireless technology and Miracast protocol to achieve. Miracast protocol is a wireless screen mirroring protocol based on Wi Fi, which can wirelessly transmit computer screen content to a television. When both the computer and television support the Miracast protocol, wireless screen mirroring can be achieved.

Specifically, the computer sends the content that needs to be transmitted to the TV through Wi Fi. After the TV receives the signal, it converts it into images and sounds that can be displayed on the TV screen through the Miracast protocol. Therefore, to achieve screen mirroring on computers and televisions, it is necessary to ensure that both computers and televisions support Wi Fi and Miracast protocols.
Steps for projecting a computer screen onto a television
The steps for projecting a computer screen onto a television are relatively simple. Taking Windows 10 system as an example, the specific operation method will be introduced below:
1. Connect to Wi Fi network
Firstly, it is necessary to ensure that both the computer and the television are connected to the same Wi Fi network. You can find Wi Fi network settings in the settings options of your computer and TV, and select the same network to connect.
2. Open Miracast protocol
In the Windows 10 system, you can open the Miracast protocol by following these steps:
(1) Open the “Settings” interface;
(2) Select ‘System’;
(3) Select ‘Project onto this computer’;
(4) Set ‘Project onto this computer’ to ‘Always off’;
(5) Turn on the ‘Project onto this computer’ switch;
(6) Set ‘PIN code required for pairing’ to ‘always allow’.
3. Connect the TV
Open the application or file that requires screen casting on the computer, and then select options such as “screen casting to TV” or “full screen casting”. At this time, a QR code will be displayed on the computer screen. Scan the QR code with a remote control or mobile phone to transfer the content of the computer screen to the TV.
4. Adjust resolution and aspect ratio
During the screen casting process, it is necessary to adjust the resolution and aspect ratio of the computer according to the screen size and resolution of the television. This can ensure the clarity and aesthetics of the projection effect.
5. End screen casting
When it is necessary to end screen mirroring, you can select options such as “End Screen Projection” or “Disconnect” in the computer or TV operation interface. At this point, the computer screen will return to its original state, and the television will also stop receiving signals.
Precautions for computer screen projection television
Although computer screen projection television is a very convenient technology, there are still some issues to be aware of during use:
- Choose appropriate models and brands for adapters and cables to avoid compatibility or signal interference issues;
- When using a wireless connection, it is important to ensure that the computer and television have established the correct wireless connection;
- During the screen projection process, it is important to control parameters such as volume and lighting to ensure the projection effect and quality;
- During use, pay attention to protecting the projector and other equipment to avoid damage or malfunctions;
- After use, the equipment and power should be turned off promptly to save energy and protect equipment safety.